9.2.17

Star Wars craft - Luke Skywalker and Han Solo


I've gone a bit old school with these Star Wars figures - they're the classic ones, but if you like, they can easily be adapted to make some of the more recent characters from the new Star Wars films.

You'll need:
Egg carton
Pencil
Ruler
Craft scissors
Nail scissors or similar (optional) Adult supervision required
Paint
Craft glue
Black felt-tip or gel pen
Blue/green straw
Black marker pen (like a Sharpie)


1. Roughly cut out two middle cones from the egg box so they're easier to work with. On one, draw a pencil line around the cone, just above the bumpy joins at the bottom. Cut along the line. This will be the body.


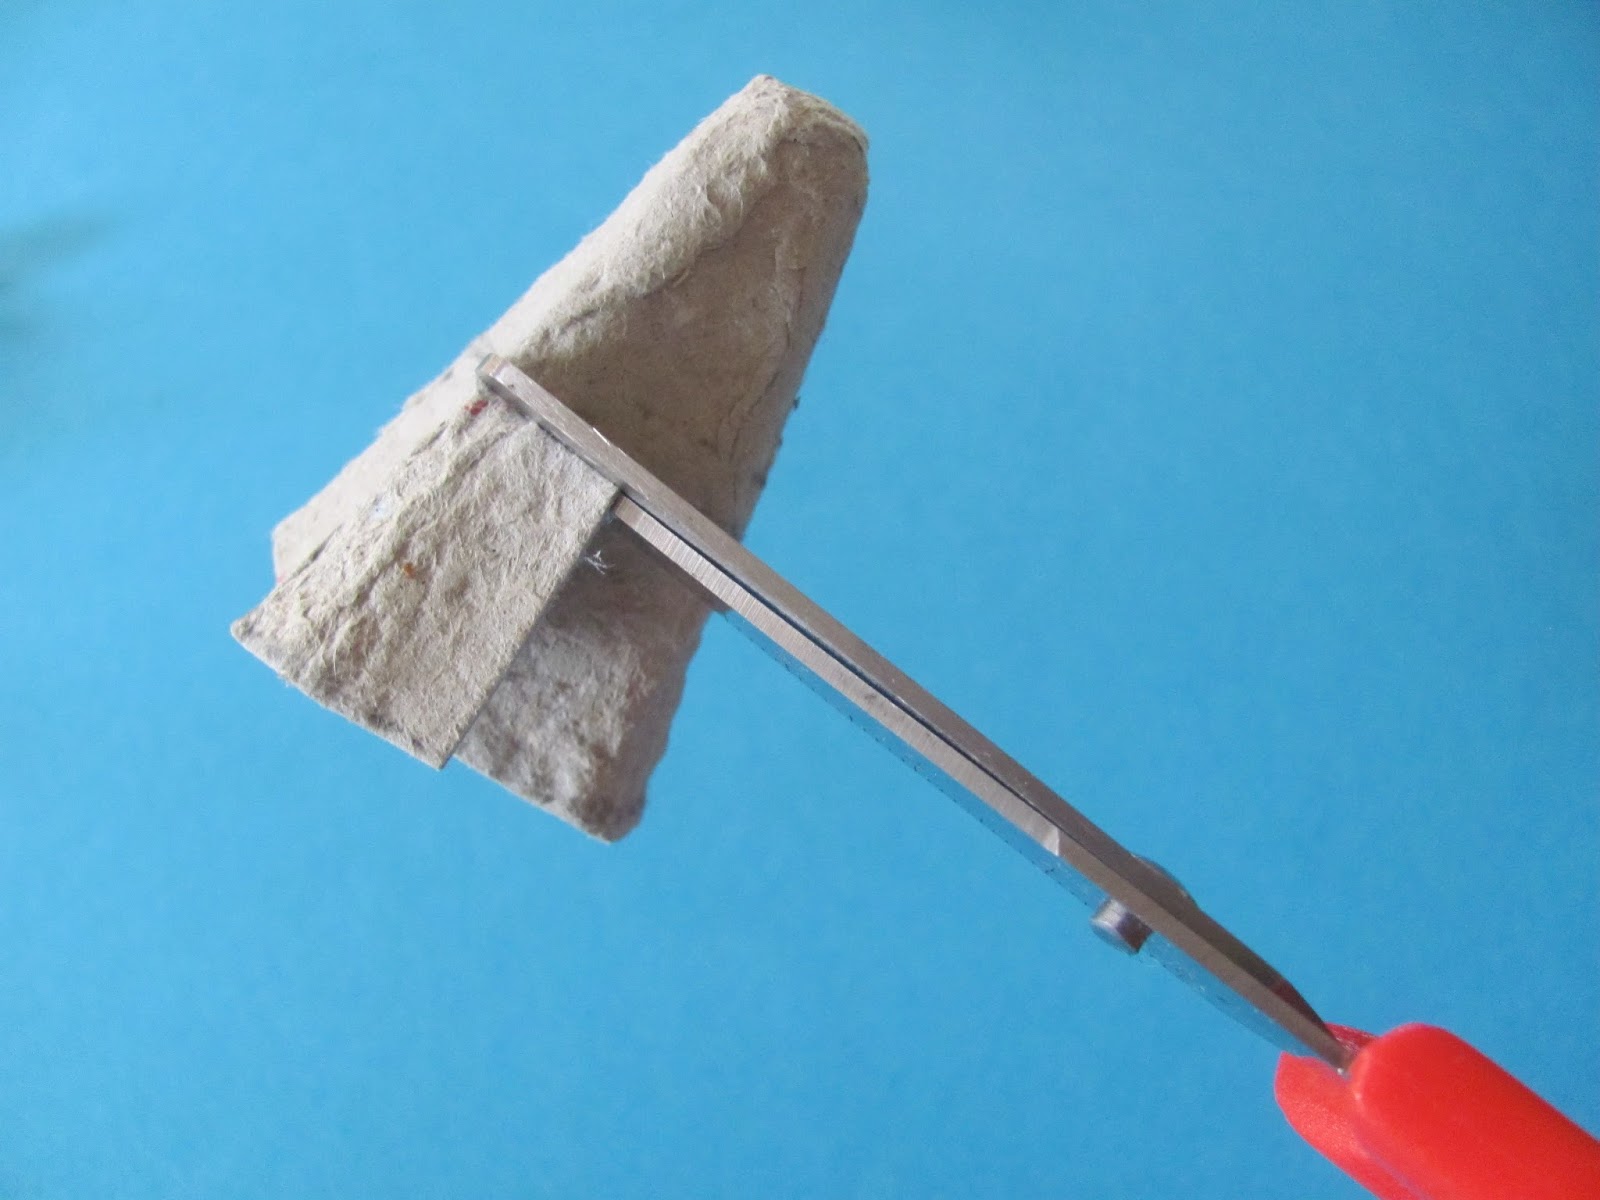
2. The second cone is for the head, and you only need the very top part. Either estimate this, or use a pencil and ruler to mark about 1.5cm (1/2in.) from the top on all sides, join the marks and cut out. A handy way to do this is to cut up two adjacent corners to the pencil line, bend the card back and cut off the flap - it should be easier now to cut along the rest of the line.

(If your cone has a hole in the top or you want an easier head option, see the tip at the bottom.)

On the body cone, lightly draw a pencil line around it, about half way up. Don't worry if the line is a little wobbly, it's just for guidance. 


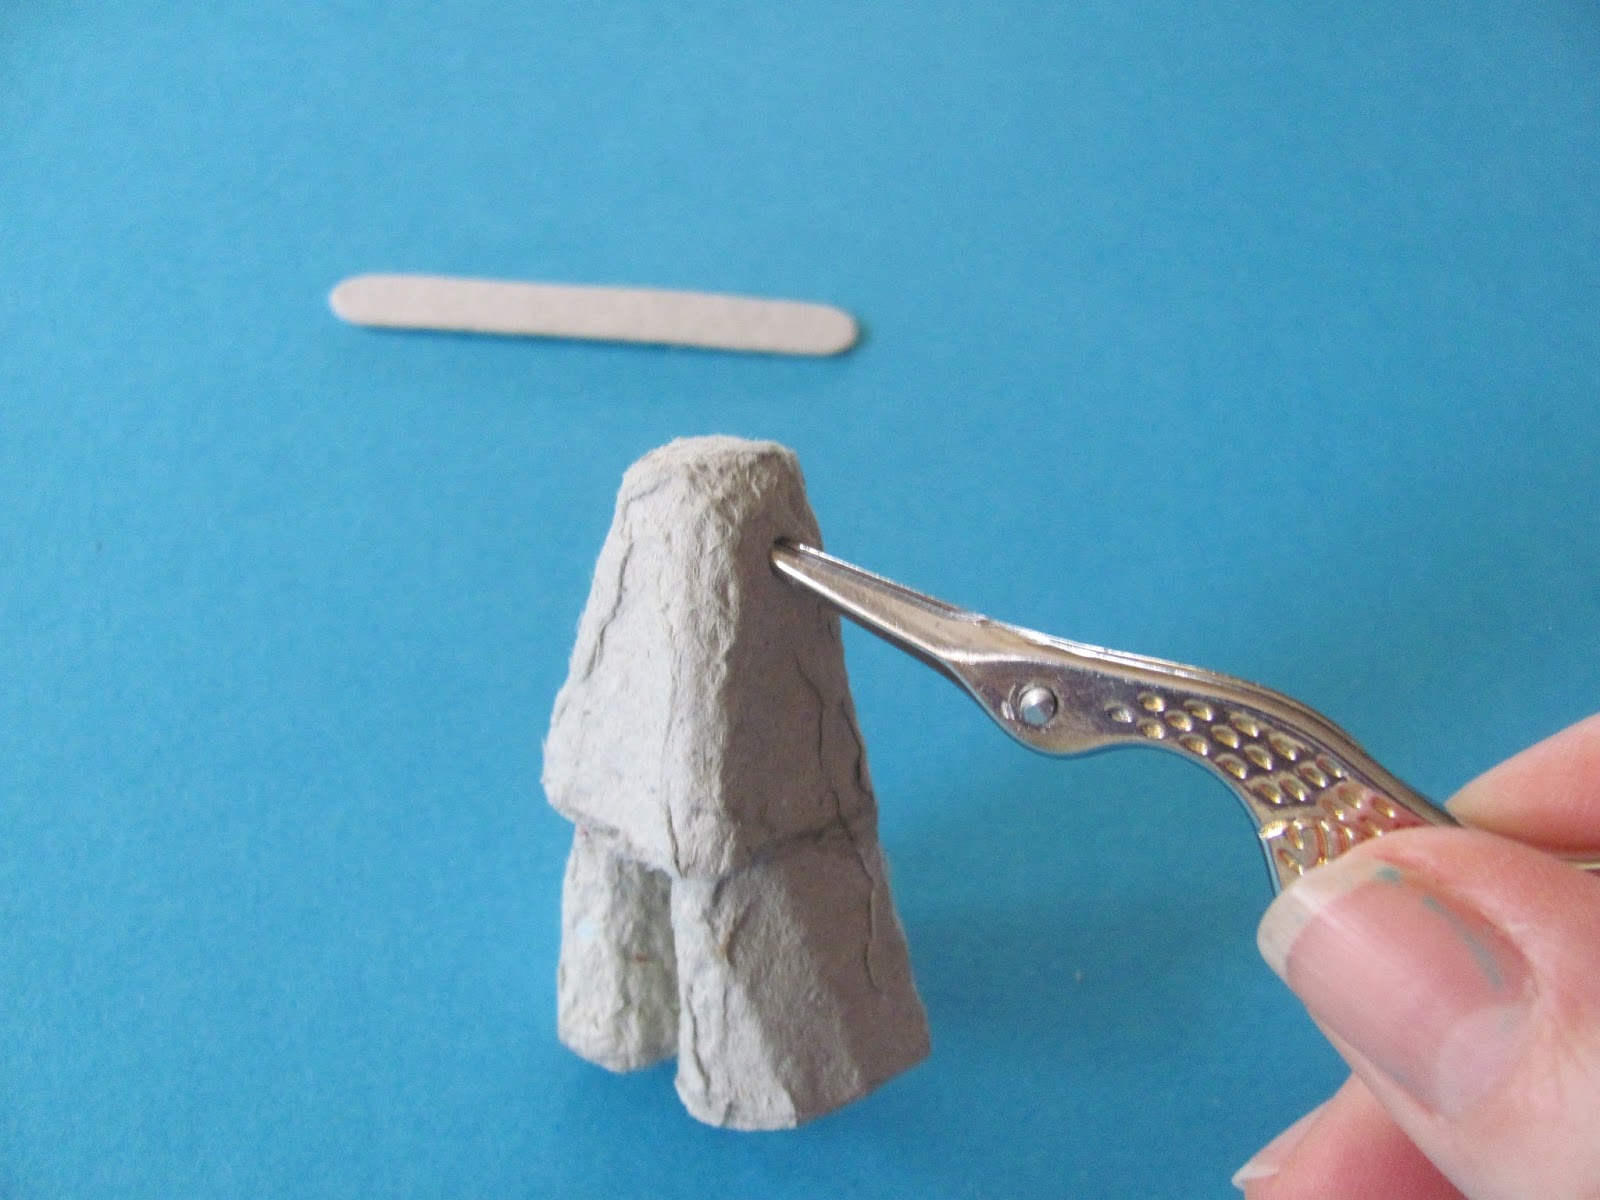
3. Cut up the middle of one cone side to this pencil line, then wiggle and turn your scissors, and cut along the line to the corner and just a little beyond.
Do the same on the other side so you've cut a 'T' shape.
Repeat this 'T' shape on the opposite side of the cone.


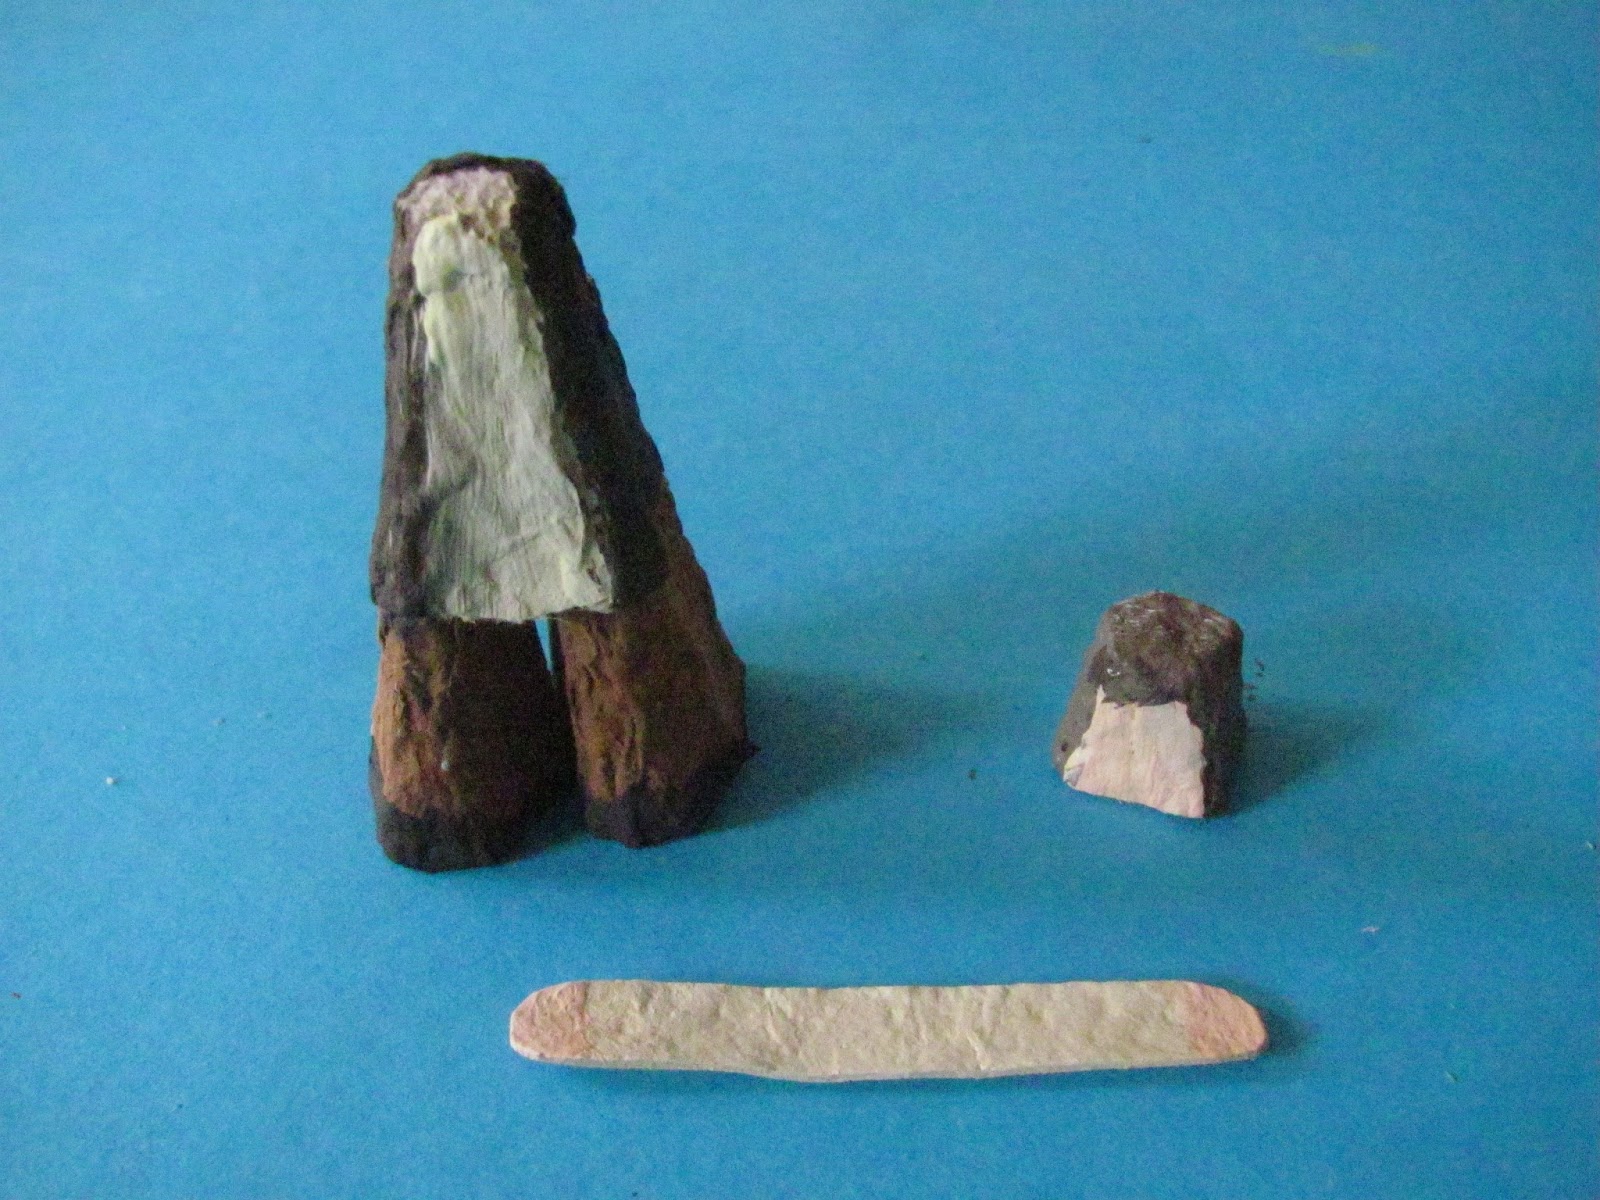
4. To form the legs, press the cut edges in the middle towards each other and squeeze and press each one into a more rounded shape. You should end up with what looks like an impressive pair of flares, which seems sort of appropriate!
If the trousers look a bit too wide, trim the edges until you're happy.


4. For the arms, cut a thin strip of card from the egg carton lid that's about 5mm (1/4in.) wide and 5cm (2in.) long. Round it at the ends for the hands.


5. Either cut the arm strip in half after the painting step (Step 6) and glue the pieces either side, or, with adult supervision, use the nail scissors to make a hole in the middle of one of the arm sides (keep the scissors closed, press down and twist from side to side.)
Once you've made the hole, snip up to the top of the cone and down the other side until the slot looks level. Cut an extra sliver out to widen the gap for the arms. Make sure the slot goes far enough down the body, so when you push the arm strip in, it sits below the top part of the cone (the head will be glued here later)


6. Now, painting time! 

For Luke Skywalker, keep the arms in and paint the body and legs white, and the bottom part of the legs brown for the boots. We gave him yellow/fair hair and made up a flesh colour with a lot of white, a little red, yellow and tiny dab of blue, for the face and hands.

TIP: Put the head on a spare egg carton cone while you're decorating it. This makes painting much easier.


7. For Han Solo, keep the arm strip out and paint it a creamy yellow and white colour and use this to paint a strip down the front of the body cone for his shirt. Paint the rest of the top part of the body dark brown (red, yellow and blue) and use this for his shoes too. Make his trousers and hair a lighter brown (add some white to the mix).


8. While the paint's drying, make a lightsaber for Luke from a blue or green straw. Cut off about 4cm (11/2in.) and colour the bottom end with the black marker pen. Cut small slits in this end so you can slot the lightsaber onto Luke's hand. For Han Solo's gun, colour about 1.5cm (1/2in.) of the straw with the black marker pen, cut this off and make slits as before.


9. When the paint is dry, use the fine black pen to draw on a face and add detail to the clothes and hair (see pics)
Slot Han Solo's arm strip back in (or is you've cut the strip in half, glue the arms either side). Glue the head on.  


Tip: For an easier head option, instead of using a cone, draw a oval head shape on a piece of spare egg carton card. Paint or colour this in with pencils or felt tips. Cut out and stick near the top of the body cone.

If your egg cones have holes in the top, brush glue inside the cones and push a small piece of newspaper up to fill the hole.


26.1.17

Make Your Own Farm Animals - kids' craft book

kids craft book

A bit of a ta-dah! moment as this is the cover of my latest craft book! Hope you like it.  I was sent an advance copy the other day, and although I've been through the instructions and the pictures more times than I care to remember, my heart was beating like the clappers when I opened it. Felt a sort of mix of excitement and a touch of terror that maybe I'd missed something important. Hopefully not! Suddenly it all feels very real. Some days that's good, some days I just worry what people will think.

When I'm not whipping myself up into an anxious frenzy I do feel so pleased with how the book's turned out - it's colourful, fun and packed full of farm projects all made from stuff that's easy to get hold of - just like Make Your Own Zoo. All you need to do really, is hang onto some recycling, and build up a small collection of egg boxes, cardboard tubes and cereal packets. Nearly everything in the book can be made from these three very ordinary bits of packaging.

Obviously the book's themed again like the last one, and everything works together, so you can keep adding to your farm, and it can all be played with after.

Make your own farm animals


I am proud of it, especially as there was a pretty quick turn around. I came up with most of the projects over the summer, which wasn't always so easy as the kids were expecting to be entertained too. But actually they helped develop some of the ideas - I was a bit stuck on what to use for the bull's nose ring and my daughter cracked that one!

You'll find all the animals you'd expect on a farm, like cows, sheep, hens, pigs etc, and I made more buildings this time, as well as a tractor that took FOREVER, because I was absolutely determined to get it right.

My books are aimed at primary school aged children, to help keep that interest in craft and creating alive, especially now there are so many other distractions. And the projects really are great for grown ups and kids to make together. That precious time is hard to hold onto these days.

Make Your Own Farm Animals is available on Amazon 

There are a number of the projects from Make Your Own Farm Animals (and from the Zoo book too) on the blog - you'll find them on the Kids Craft Page.


17.1.17

Cork bunny with a heart - Valentine's crafts for kids


Another cork craft idea inspired by my sizeable Christmas cork collection... from something fizzy this time! The shape at the top is perfect for a head, so we thought rabbit - and it would make a sweet present for Valentine's day, especially with a little message written on the heart.

You'll need:
A Champagne/cava cork
White paint (acrylic is best)
Pencil
Red, pink and plain paper
Black felt-tip or gel pen
Pink felt tip pen (optional)
PVA/craft glue or a glue stick
Old Christmas/Birthday card (optional)

1. Paint the cork white, you may need a few coats - acrylic paint is best when you're using white. While it's drying, fold a small piece of plain paper in half and draw half a long rabbit's ear on the fold. Make it about 6cm (21/2in long) and cut it out.


2. Before opening your ear up, place it on another folded piece of paper, lining up the folds and draw around it carefully. Cut out the second ear and open them both up - this is the quick way, and should keep the ears roughly the same size.

If you prefer, after cutting out one ear, open up and stick to some spare cereal box card, and when dry, cut out the ear to make an easy template to draw around. Keep the template for extra bunnies!
Use whatever method you prefer.


3. For the pink ear middle the quick, easy option is to use a pink felt-tip pen. Draw an outline inside the white ear first, and then colour it in.
We decided to use some pink paper. Fold it as in step 1, and draw a shorter (about 5cm/2in) and narrower ear shape that will fit inside the white one. Copy this, by following step 2, then rub glue stick or brush a thin layer of craft glue on the back of the pink pieces and glue them in the middle of the white ears.


4. Brush some glue on the bottom cm or so of the ears and fold them in half lengthways, pinching the glued bottom part so the sides stick together - then glue this bottom bit to the sides of your bunny's head. If they're slipping or popping off - lie on its side with a book leaning on the top ear.


5. While that's drying. cut out a strip for the arms - make it about 1cm wide (1/2in) and 8cm long (2in), though it might need to be longer if you have a big cork.


6. Cut a strip for the arms - make it about 1cm wide (1/2in) and 8cm long (3in), though it might need to be longer if you have a big cork. Round off the ends for the paws. You could fold the strip in half and round off the unfolded end so when you open it out, the paws look the same.

7. Brush or rub some glue either side of a middle fold, leaving the arm ends glue-free. Stick the middle gluey part of the strip to the back of your bunny, in the groove just below the head.


8. Use a fine black felt-tip or gel pen to draw on a face - then, while pressing the ears where the attach to the head, use your free hand to press open the top part of the ear, so you can see the pink middles clearly and the ears look fuller.


9. Lightly fold another small piece of coloured paper in half and draw half a heart on the fold - make it roughly the same height as the bottom section of the cork, below the head. Try not to press too hard on the fold so there isn't a heavy crease line on the heart. Cut out and open up your heart shape. This is the time to add a Valentine's message if you want.


10. Dab some glue or rub glue stick on the paw ends on the inside, and attach one paw to one side of the heart (make sure the pointy part of the heart is roughly level with the base of the cork). Fold the paw around the edge of the heart, pinching together. Repeat on the other side, keeping as even as you can.


TIP: You could stick the paper heart to some spare cereal box card and when dry cut out to make a heart template. Use this to draw around on some old Christmas or Birthday cards to make a more patterned, colourful heart for your bunny to hold. 

11.1.17

Cork lovebirds - Valentine's crafts for kids


I'm not the biggest fan of Valentine's day, but I am partial to a good hearty craft, and unlike most Valentine's stuff, this one won't cost you! 
These little lovebirds are made from corks (saved up over Christmas.. I have many.. ) They are quick and easy to do and can be turned into a useful gift, like a keyring or a fridge magnet. Love a useful craft! You could also write a little Valentine's message on the heart if you want to.

You'll need:
A cork
Coloured paper
Paint
Hole punch
Glue stick
Craft glue
Fine black felt tip or gel pen
Feather (optional)
Mini eye pin (optional)
Keyring (optional)
Small magnet (optional)
Strong all-purpose glue (optional) 

1. Paint the cork any colour you want. 


2. Fold a small piece of coloured paper in half and draw half a heart on the fold. You want it to be roughly half to two thirds the length of the cork - and make it narrow. If it looks too big, fold the heart again and trim until you're happy with the size.


 3. Carefully cut around the shape and open it up.


4. Rub some glue stick on the back of the heart and glue it to the cork with the point almost touching the bottom edge. Cut a strip of different coloured paper for the wings - make the shorter side about the same height as the heart. If you're making a penguin, leave out the wing strip.


5. Line the edge of the strip up with one side of the heart and the base of your bird, and wrap the rest around the cork - cut away any extra paper where it touches the other side of the heart.


6. Rub glue stick on the top half of the strip only and glue in place, so the bottom of the wings stick out slightly.


7. For the eyes, use a hole-punch to punch out some circles - rub a little glue stick where you want the eyes to go on the cork, wet your finger to help pick up the little circles and stick them in place.


 8. Use a fine black pen to add the centres.


9. For the beak, cut out a small triangle from yellow or orange paper (or colour in some plain paper), rub glue stick just below the eyes, wet your finger to help pick up the triangle, and glue in place.


10. Paint feet on the bottom edge with yellow paint and leave to dry.


11. To add a feathery head plume, make a hole on top by screwing in a small screw, nearer to the front of your bird. Take the screw out.


12. Choose a feather, dab a little glue on the pointy tip and push it into the hole.


13. To make your lovebird into a keyring, screw a mini eye pin (seen in step 11) into the top of your cork and attach a keyring. Or, for a fridge magnet, glue a small magnet to the back of your bird. Use strong all-purpose glue like UHU.


I got these little magnets on Ebay - they're a great size, weren't expensive and are seriously strong. Nothing worse than a fridge magnet that doesn't hold stuff!


Linking up with Trash2Treasure