Showing posts with label easy hearts. Show all posts

5.2.18

Pop Hearts - crafts for kids


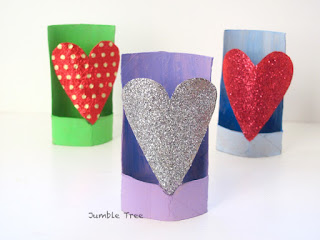
These pop hearts make a lovely gift and they're really easy to make, all you need is a toilet paper roll or some other kind of cardboard tube. We've left ours plain, but you could personalise them with a short message below the heart.

You will need:
TP roll
Pencil
Ruler
Scissors
Paint
Craft glue (optional)
Glitter (optional)
Coloured foil (optional)

1. Flatten the cardboard tube with your hand - press down along the sides, so you can see the creases.


2. Squeeze the tube back into shape, then line up the two creases you've just made, in the middle, and flatten again, pressing down on the sides.


3. While the tube is flat, use a ruler and pencil to draw a line across the tube, about 2cm from the bottom.


4. Use the scissors to cut down the two side creases to the pencil line.


5. Squeeze the tube back into shape, then line up the cuts you've just made in the middle, and press the tube flat again.


6. Draw half a heart on one side of the tube and take it right down to the pencil line, but don't bring it into a point here (or your heart will fall off..), leave about a cm.

7. Cut around your heart (younger makers may need some help cutting through the double card). To make it easier to cut out the strip at the side of the heart, once you've cut to the pencil line, bend the card out and snip it off. Repeat on the other side. Then squeeze your tube back into shape.


8. Paint the inside of the tube and everywhere else too, except for the heart. When the paint's dry, use the pencil to draw in the bottom tip of the heart.


9. You could go with the norm, and paint your heart red, (or any colour) - or cover it in a thin layer of glue, and sprinkle glitter over it. Or do both!


9. We decorated one of our hearts with some colourful tin foil kept from Christmas chocolates.


Cover the heart in a thin layer of glue and line up a corner of the foil with the pointy tip of the heart. Then carefully smooth the foil over the card. Cut away most of the excess, leaving some to tuck around the back.


Put some glue on the edges at the back, and mould the tin foil around the heart. If you don't have a big enough piece of foil, it would look good with a patchwork of different coloured pieces too.
Maybe keep some aside this Easter, though care and patience may be needed to get the foil off in one piece!


15.1.16

More things to make with old cards - 3D heart bunting

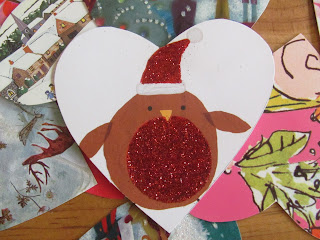
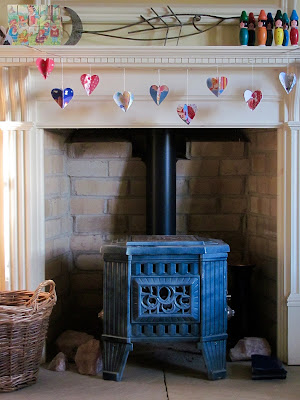
So there were still quite a few cards left after making the Very Hungry Caterpillar, and with Valentine's Day around the corner we decided to go with hearts.


I made this collage from cut up cards a few years ago, and though I was pretty happy with how it turned out, it was faffy and took forEVER....


These 3D card hearts are a lot easier!


1. First, fold a piece of plain paper and draw half a heart on the fold. Make your heart any size you like. We wanted to be able to get a couple from one picture, so ours aren't too big (8cm).


Open up and carefully draw round the heart on the back of a card. Cut out and use this heart as a template for the others.


2. For each 3D heart you'll need four cut outs, paired up (we went for matching designs and similar colours).


3. Glue the backs of the paired hearts together - match the dip at the top when you're gluing them.


The hearts will probably pop away from each other, so, put a book or a bread board on top to weigh down and keep them flat while they dry.

4. When they're dry, trim away any obvious sticky out bits around the edges.

5. Cut halfway down a heart from the dip at the top, and halfway up the matching one from the bottom tip. It's important to snip away a extra sliver from these slots to widen them, so the hearts slot together without buckling. If they still buckle and don't sit properly, trim a little more from the slots, but not too much; don't want your heart falling apart...


6. Decide what you want to hang your hearts on - ribbons, string, yarn - we used some leftover silver Christmas ribbon - decide on the length too, and tie it, stretched out, between two chairs.

7. Un-slot a 3D heart and work on the part with the slot at the bottom. Thread a needle and make a hole under the dip at the top.


8. Tie the heart onto the ribbon, when you're happy with the height, tie a double knot, then wrap one end of the thread around the ribbon again and tie another tight double knot to hold it in place.


9. Repeat along the length of the ribbon, keeping them evenly spaced. We arranged ours at different heights, in a sort of higgledy piggledy fashion.


If bunting is more hearts than you can handle, you could always make single hanging heart decorations. A handy little gift idea?


Linking up with Coombe Mill's Trash2Treasure