Showing posts with label cork craft. Show all posts

4.5.20

Cork Yoda fridge magnet - Star Wars craft


May the Fourth with you be! 

This little Yoda combines two of my favourite things to craft with - corks and egg cartons!

You will need:
Champagne/Sparkling wine cork
Egg carton
Paint
Black gel or marker pen
Craft glue
Strong glue, like UHU, or a glue gun
Brown paper or plain paper painted
Magnet (optional)

1. For his distinctive sticky out ears, cut out two long pointy triangle shapes from the egg carton lid. Glue them either side of the wider, top part of the cork, pointing forward. 

They will stick with PVA craft glue eventually, but easier and quicker to use a stronger clear glue or a glue gun if you have one. I don't have a glue gun and used UHU glue for bits like this.


2. When the glue has dried, bend the ears back into place.


3. Paint your Yoda's body green, plus some spare egg carton card for the hands and feet.

When dry, draw two hand shapes (see below) To cut out, cut around them roughly first, then snip out the zigzag bits, before cutting around the rest of the hand.


4. For the feet cut two short strips from the green card (place them under the cork body to make sure they're the right size and not too wide). Then, snip out a few zigzag triangles.

Glue the feet under the cork body.


5. His cloak is made from the middle part of an egg carton cone.  Once you've cut the cone out, cut the top off, just squeeze the cone flat and cut across the card. Press back into shape - the top will look uneven, so trim until you have a nice straight edge.


6. For the billowy sleeves,  use the edge of the carton as it often has a rather nice little turn up! It's also easy for cutting. Cut two of the shape below. 


7. See the little turn up? No worries though if your carton doesn't have this lip around the edge. For the cloak opening, cut a strip out of one side of the cone.

Check the cloak is the right size for your Yoda - shorten the top part if it's too big.


8. Glue the hands behind the ends of the sleeves, so you can see them. If you have a little turn up, make sure you glue on the other side. Craft glue will work for this, or you could use the stronger glue.


Glue the sleeves either side of the cloak.

Then, glue the bottom of the sleeves to the front part of the cloak, by the opening. You might need paper clips (or laundry pegs) to hold the arms in place while the glue dries.


9. While the glue is drying, cut out a short strip of brown paper (or paint some plain paper) that covers the thinner part of the cork, below the head and above the feet. It doesn't need to go around the back of the cork as this will be covered by the cloak.

Glue in place with a thin layer of craft glue or a glue stick.

10. Use a black pen to add some Yoda-ish features.


11. Glue the cloak onto the back and sides of the body.


12. If you want to make your Yoda into a fridge magnet, use the strong glue to stick a magnet on the back.


11.12.18

Simple cork craft for Christmas!


...well, it is that time of year when there might be a few corks knocking about!

This is a very simple Santa craft, based on the gnomes from 'Brian the Lion goes into Space' - so if you'd like to make one, follow the step-by-step instructions for a gnome here.


The only changes are:

Paint the top part of your cork a pinky colour for the face (mix a little red with lots of white, a spot of yellow and tiny touch of blue).

Either paint the bottom part red, or use red paper. Instead of blue feet/shoes, use black paper (or colour-in some plain paper).


For a little extra detail, tease out a thin strip of cotton wool and glue it around the bottom of the cork. Use a black pen to draw a belt around his middle. Add a tiny ball of cotton wool to the top of Santa's red hat.


6.12.18

How to make the gnomes from Brian the Lion

It's the gnomes turn to take centre stage!


There's already a Brian the Lion tutorial here, and this project shows you how to make the little blue, beardy gnomes that Brian meets during his adventures in my book, 'Brian the Lion goes into Space.'
They're very simple to do - just corks and cotton wool!

You will need:
Cork (wine cork shape or cava/champagne shape)
Paint
Scissors
Blue paper (or plain paper coloured blue)
Cotton wool
Glue stick
PVA craft glue
Black felt-tip pen or gel pen

1. First, paint your cork light blue (mix a little blue with a lot of white) The champagne style corks have an obvious head shape.


2. Cut a strip of blue paper (or colour-in plain paper) Make it few cm's wide, so it's about half the length of the cork. Cut a piece that's long enough to wrap around the cork with a little overlap.


3. If you have a glue stick, rub this over your strip of paper and glue in place. With craft (pva) glue, it might be easier to brush a thin layer on the bottom half of the cork and wrap your paper piece around it, adding a tiny dab more glue where the paper overlaps.

4. Cut another thinner strip for the arms - it needs to go around the back of the cork with the arm length even on both sides. You can round off the strip ends for hands if you want, or leave them as they are. Glue in place.


5. For the gnome's shoes, place the cork on the paper and draw around it, but extend your circle shape out a bit at the front (see pic)


Cut out, and mark a 'V' shape in the middle of extra front bit that sticks out, to define the shoes. Snip out the 'V'. Glue the rest under the cork.

6. For the gnome's beard, take a small piece of cotton wool - we unwrapped a cotton ball and used one end of it. Decide how long you want your gnome's beard to be, then gently pull a hole in the cotton wool just above your chosen beard size.


7. Brush a layer of craft glue over the top and sides of the gnome's head and a little on his front, below his head, but leave a space for his face. Carefully press the cotton wool into place, around the face. Try not to get glue on your hands or his beard will stick to your fingers! Gently tease the cotton wool down at the back and sides, to cover the head, and cut any extra off. Press and trim the front too, until you're happy.


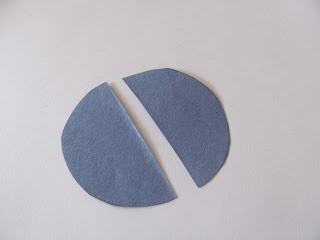
For the gnome's hat, draw around something like the base of a small glass, or jar or beaker, and cut the circle out. Fold it in half and cut along the crease. Rub or dab some glue along half the straight edge and carefully fold and bring the sides together to make a small cone shape. Press with your fingers until the glue holds.


You could glue the hat on, or leave it, so your gnome can take a nap.

Because of course, they sleep on their heads...


17.3.18

Happy St Patrick's Day...


..from Brian the Lion and his blue, beardy friend (visiting from a planet far, far away... )

Brian the Lion

Find out how they met in my new book, 'Brian the Lion goes into Space', which is out next month. More about that soon!


6.3.17

Ted with a heart - cork craft for Mother's Day


Following almost hot on the heels of the bunny cork with a heart, comes Ted, and he's even easier to make! Again you could write a personal message on the heart, or even use a photo. Plenty of ways to make it a lovely little Mother's day gift.